
Introduction
Harvesting cannabis is a crucial phase in the cultivation process. The timing and methods used can significantly impact the quality and potency of your yield. In this guide, we’ll explore the best practices for harvesting cannabis, ensuring you make the most of your hard work.
What are Cannabis Seeds
Cannabis seeds in Canada are the starting point for cultivating cannabis plants. With the legalization of cannabis, buying cannabis seeds in Canada has become accessible and popular among enthusiasts and cultivators. These seeds come in various strains, offering a range of effects and flavors. Whether for medicinal or recreational purposes, Canadian growers can select from feminized, autoflowering, or regular seeds. The diverse climate across Canada also influences the choice of seeds, catering to indoor or outdoor growing conditions. Buying cannabis seeds in Canada is a straightforward process, thanks to numerous reputable online and physical seed banks across the country.
Knowing When to Harvest
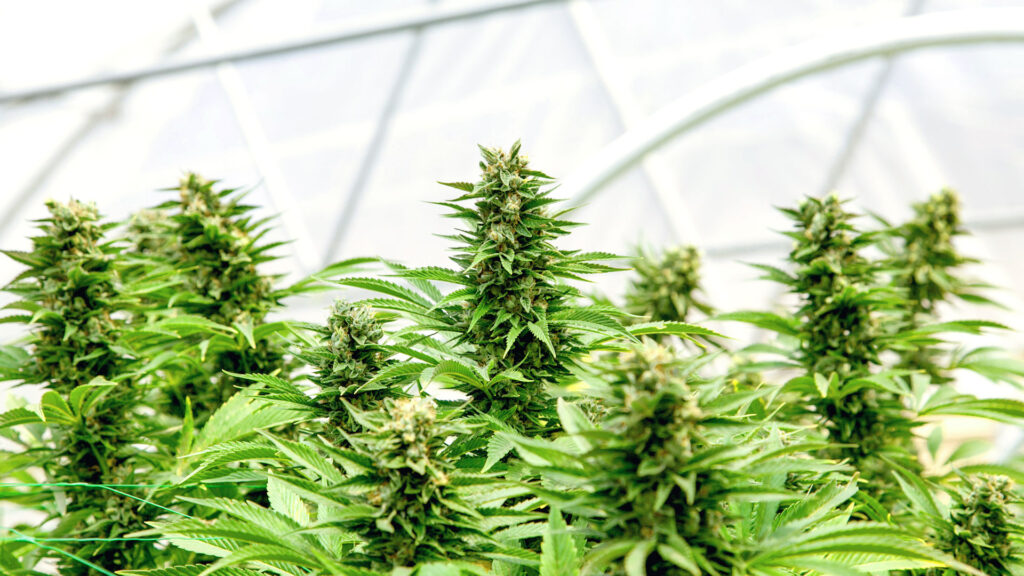
The key to a successful harvest lies in perfect timing. Harvest too early, and the THC won’t be fully developed; too late, and it degrades into CBN. Look for these signs to determine the right time:
- Seed Datasheet: When purchasing seeds, pay attention to the indicated harvest time. However, use this as a guide rather than a strict schedule.
- Leaves Turning Yellow: As the plant nears the end of its life cycle, fan leaves will turn yellow, indicating that harvest time is approaching.
- Pistils: Watch the pistils (pollen-catching hairs) turn from white to dark red-brown. Once around 90% of pistils have changed color, the plant is likely ready.
- Trichomes: The most reliable indicator is the trichomes, where THC is produced. Aim for 70% white, 15% amber, and 15% clear trichomes for optimal harvest.
Preparing for Harvest
Preparing for harvest is a critical stage in cannabis cultivation, requiring meticulous planning to ensure quality yield. As harvest time approaches, monitor trichomes and pistils for maturity signs. Prepare your space with adequate ventilation and controlled humidity and temperature, essential for drying and curing. Gather essential tools like sharp trimming shears, gloves, drying racks, and airtight jars for curing. Ensure cleanliness to avoid contamination. Timing is crucial; harvest early in the day if possible. Finally, be ready for post-harvest processes like trimming, drying, and curing, which are vital for maximizing potency, flavor, and overall quality of the cannabis buds.
Essential Tools
- Magnifying Lens: For inspecting trichomes.
- Trimming Shears: Sharp and robust for cutting the plant.
- Gloves: To handle resinous branches.
- Collection Tray: To place harvested branches.
- Fan: For air circulation during drying.
- Hangers: For hanging branches.
- Herb Dryer (Optional): For drying.
- Jars: Glass, airtight jars for curing.
Harvesting Cannabis Step by Step
- Identify the Right Time to Harvest:
- Monitor the trichomes on your buds using a magnifying glass. Look for a mix of milky white and amber trichomes for peak THC levels.
- Observe the color of the pistils. When most have darkened and curled, it’s usually time to harvest.
- Prepare Your Tools and Space:
- Gather sharp scissors or pruning shears, gloves, drying racks, and airtight containers for curing.
- Ensure your harvesting area is clean and spacious.
- Harvest Early in the Day:
- Cannabis plants are best harvested in the morning when their terpene levels are highest.
- Cutting the Plant:
- You can either cut the whole plant at its base or snip individual branches. The method depends on your drying space and plant size.
- Trimming:
- Remove the large fan leaves first, as they contain fewer trichomes.
- Trim the smaller sugar leaves close to the buds. These leaves are coated with trichomes and can be saved for making concentrates or edibles.
- Drying:
- Hang the trimmed branches upside down in a controlled environment (ideal conditions: 60-70°F with 45-55% humidity).
- Ensure good air circulation and avoid light exposure. Drying typically takes about 7-10 days.
- Checking for Dryness:
- Your buds are ready for curing when stems snap rather than bend, and the outsides of the buds feel dry to the touch.
- Curing:
- Place the dried buds in airtight jars, filling them up to ¾ of their capacity.
- Open the jars several times a day during the first week for a few minutes to let out moisture and replenish oxygen (known as “burping”).
- After the first week, reduce burping to once every few days. The curing process typically takes about 2-4 weeks, but longer curing can enhance flavor and potency.
- Storage:
- Store your cured cannabis in a cool, dark place. Properly cured and stored cannabis can last for a long time without losing potency.
Handling Different Strains
Handling different cannabis strains requires understanding their unique characteristics and growth patterns. Each strain has distinct needs in terms of light, nutrients, and water. Indica strains, typically shorter with dense foliage, might require more pruning to enhance airflow and light penetration. Sativas, known for their height and slender leaves, may need support structures as they grow. Autoflowering strains, on the other hand, have a shorter growth cycle and are less light-dependent. It’s crucial to tailor your growing environment and care regimen to suit each strain’s specific needs. Additionally, harvesting times vary significantly between strains, so monitoring development and maturation signs is key for optimal yield and quality. Adapting your approach for each strain ensures the best possible outcome from your cannabis cultivation efforts.
Progressive Harvesting
Progressive harvesting is a technique used in cannabis cultivation where buds are harvested at different times based on their maturity, rather than harvesting the entire plant at once. This method is particularly useful for plants that have buds maturing at varying rates, often due to uneven light distribution. The process involves selectively cutting ripe buds, typically those at the top of the plant that receive more light and matures faster while allowing the lower, less mature buds additional time to develop fully. Progressive harvesting maximizes the overall quality and potency of the yield, as each bud is harvested at its peak. It’s a strategic approach that can lead to a more extended harvesting period but results in a more uniform and high-quality product.
Trimming Your Flowers
Trimming improves the aesthetic and prevents sugar leaves from overwhelming your stash. Choose between wet trimming (immediately after harvest) and dry trimming (after drying). Keep sugar leaves for making extracts.
Drying Your Buds
The drying process involves removing moisture from the exterior of the buds. Set up a dedicated space with a temperature of about 21°C and a relative humidity of 50%. Drying takes 2–7 days, and the buds should snap under force when ready.
Curing for Smoothness
Curing further enhances flavor and potency. Load your harvest into glass jars, filling them to 75% capacity. Store in a cool, dark place. Initially, open the jars several times a day to release moisture (burping). After three weeks, your cannabis should be sufficiently cured. For long-term storage, curing can extend to six months.
Conclusion
Harvesting cannabis is an art that requires patience and attention to detail. By following these guidelines, you can ensure that your cannabis plants are harvested at the right time, with the right techniques, leading to a high-quality yield. Remember, the final quality of your buds is greatly influenced by these last steps of your cultivation process. Happy harvesting!